


Step-by-Step Guide To Hassle-Free Lash Infills!
The Ultimate Guide to Perfecting Your Eyelash Extension Infills
Feeling a bit daunted about tackling a client's lash infills? No worries, we’ve got your back. Here are some tips and tricks that’ll make lash infills a breeze. Soon enough, you’ll find them to be a smooth ride and refreshing change from full sets. Let's dive in!
Getting Ready for Success
First off, give yourself plenty of time. Make sure to set aside at least an hour and a half for each infill appointment. Don’t stress if you need more time—it's all about getting it right and not rushing.
Encourage your clients to book their next infill appointment at the end of their full lash set appointment to avoid long gaps between sessions and keep those lashes looking fresh. Aim to schedule infills no more than three weeks after the full lash set, and let clients know you need at least 50% of their lash extensions still attached when they come in. Anything less than 50% and they’ll be considered a new lash set instead.
It’s also important to educate your clients on proper lash aftercare. They should be cleaning their lashes daily with a specially formulated lash shampoo and cleansing brush. Clean lashes mean easier infills and better results! Consider retailing your own aftercare kits and providing Aftercare Leaflets to help ensure clients take proper care of them.

Squeaky Clean Lashes
So… you did a full set three weeks ago, reminded your client about aftercare, and yet, here they are with dirty lashes. It happens! Keep lash shampoo and cleansing brushes handy so you can clean their lashes thoroughly before starting their lash infill. This also gives you a chance to show them the correct cleaning technique.
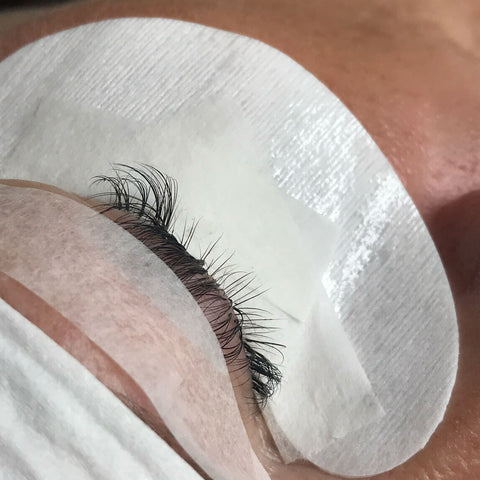
Once those lashes are clean, it's time to apply under eye patches.

Removing Unwanted Lashes
Next, you'll need to remove any lash extensions that make the set look untidy, like those that have grown out more than 3mm or are twisted.
The quickest way to remove those lashes is by using the 'Banana Peel Method' with your eyelash tweezers. Just grip the natural eyelash with one pair of lash tweezers and the eyelash extension with the other, and gently peel it away. If the lash extensions are stubborn due to excess eyelash glue, don't fret. A tiny bit of eyelash extension remover will help dissolve the glue for easy removal. Alternatively, you can pinch the base of the eyelash extension to break the lash glue bond.
This step is also a good time to discuss with your client about their comfort and any changes they’d like. Feedback helps you improve and progress more quickly to ensure happy clients.

Applying New Lashes
Before applying new extensions, remember to use your Cleanser and Primer on the natural lashes, just as you would for a full set of lash extensions. If you're still mastering your skills, it might help to map out the lash line again to ensure accurate placement.
Sometimes, you'll notice that one lash line is fuller than the other. This is normal and could be due to how your client sleeps or little habits like touching one eye more than the other. Start by working on the sparser side until both eyes look even, then continue as usual.
With a bit of prep and these handy tips, infill appointments can be smooth and straightforward. Communication with your clients is key to understanding their needs and expectations. Implementing these simple strategies will lead to happier clients all around!


